Contents
- Introduction
- Ways to Minimise Bounces
- How can I add a strapline to my site header?
- How can I add freestyle content to my Sellerdeck Desktop site?
- How can I create a banner at the top of a page?
- Summary
Introduction
A website ‘bounce’ happens when a visitor lands on a page of your website and leaves without visiting any other pages. It’s almost always a terminal event. Bouncing visitors don’t come back.
Bounce may be good if you’re Tigger – but not if you’re an ecommerce business!
Some bounces are unavoidable; but an unusually high bounce rate means that too many visitors are not finding what they are looking for. It can also have a negative impact on your search engine rankings.
According to SEMrush, a good bounce rate is in the range of 26-40%, with anything over 56% considered high.
A high bounce rate can simply mean that you are either attracting the wrong kind of visitors – for example through poorly-targeted marketing activities. But it often means that the site is not performing as it should and is losing potential sales.
Ways To Minimise Bounces
1. Load pages quickly
Site visitors are impatient, particularly when browsing on a mobile device. No page should take more than 2 seconds to load the first screenful of content. Browse your own site and watch how quickly the pages load. See for yourself the actual user experience – don’t rely on page speed tools. These can be useful, but tend to focus on aspects of the server configuration that don’t have a lot of impact on static pages such as those generated by Sellerdeck Desktop.
When loading static HTML pages, most of the impact on page load time comes from one of two things:
- Image size. Make sure that your images are no larger in actual size than the display size in the browser; they are appropriately compressed (most good image editors can handle this); and there are not too many on each page. Contact your Sellerdeck account manager if you need more help with image optimisation.
- Server performance. Invest in good quality hosting that isn’t sold on price. Cheap web hosts make their money by squeezing as many websites as they can onto a single server – to the detriment of all. Cheap hosting is OK if you’re running your site as a hobby. It’s a bad investment for a business. Sellerdeck Hosting is optimised for Sellerdeck Desktop sites and will help to ensure optimum site performance.
2. Make an impact
Use unique and impactful design to grab visitors attention.
Even the best site templates can’t avoid being a bit monotonous and same-ish. Use a web designer to create a unique design for your site. If this is beyond your budget, then commission some unique and powerful imagery for the top of your web pages.
See ‘How can I create a banner at the top of a page?’
3. Be relevant
Use your market knowledge to anticipate your visitors’ questions and expectations and satisfy them in their first page view. Research suggests you have only 50 milliseconds to make a good impression, so make the most important content stand out.
Sum up the page in punchy text or imagery at the top of the page body. The most eye-catching content needs to convince visitors that they are about to find what they are looking for.
4. Represent yourself well
Make your USPs clearly visible to visitors to your site.
- Display them in text form as a strapline or bulleted list, so that they are easily readable by both site visitors and search engines.
- Position them prominently, don’t hide them away near the bottom of the page. Put them in a Fragment at the top of the page body, or in the page header – see ‘How can I add a strapline to my site header?’

Make sure your site is consistent with your USPs. For example, if one of your USPs is ‘great looking products’, don’t let them down with cheap, poor quality images.
5. Create stickiness
Build in features and content that make the site ‘sticky’ and hard to leave. Encourage visitors to engage and to click deeper into the site.
- Provide additional non-product content that will differentiate you from your competitors. See ‘How can I add freestyle content to my Sellerdeck Desktop site?’
- Have clear calls to action on each page.
6. Provide reassurance
To have confidence to make a purchase, new visitors in particular need reassurance about a number of things:
- How can I add freestyle content to my Sellerdeck Desktop site?’ And provide multiple options for customers wanting to contact you.
How can I add a strapline to my site header?
Depending on your site templates, you can easily add a strapline beneath the company logo in your site header.
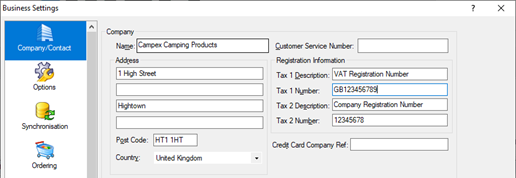
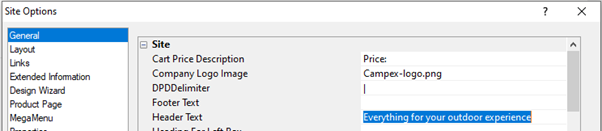
- Select ‘Site Options’ from the Sellerdeck ‘Settings’ menu and click the ‘General’ tab.
- Enter your strapline in the ‘Header Text’ field:
- Select the Sellerdeck ‘Design’ tab and click the ‘Split View’ icon.
- If the strapline is already visible in the Preview, then click it and select the required Font Family, size and attributes from the Design tab toolbar:

- If the strapline is not visible – for example if you have a custom design or your site is based on Sellerdeck Swift – you will first need to add the necessary variable to the design:
- In the Preview, click in an empty part of the header to select the ‘Header Area’ layout.
- In the Layout Code area, Scroll to find the ‘LogoLayout’ selector and double-click it to open the logo layout.
- Scoll to the bottom of the Layout Code area, add a new blank line at the end and type enter the code for a line break: <br>
- Click the ‘Insert a layout from the Library’ icon in the toolbar above:

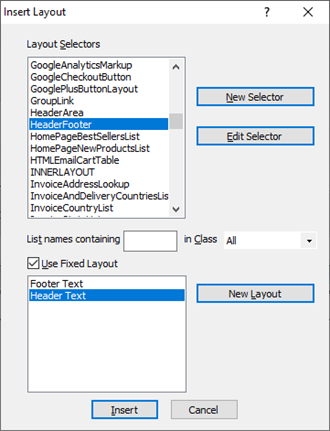
- Scroll down and click the ‘HeaderFooter’ selector. Then tick ‘Use Fixed Layout’, select ‘Header Text’ and click ‘Insert’:
- Click ‘Apply’, then go to paragraph 4 to adjust the style as required.
How can I add freestyle content to my Sellerdeck Desktop site?
If your ecommerce site only contains products, you may be missing an opportunity to provide unique content that will set you apart from the competition.
Brochure pages in Sellerdeck Desktop allow you to create freestyle pages containing almost anything you like. You can add content such as customer endorsements, FAQs and ‘How to’ articles, as well as any images or videos that you want.
- To add a Brochure page, right-click the ‘Home’ icon in the Content Tree and select ‘New Brochure Page’.

- Give the page a Name, eg ‘FAQs’, and click ‘Apply Changes’.
- This adds a new blank page to your site, which you will fill with elements called ‘Fragments’. Each Fragment can display a heading, text, an image or a video, or any combination of those.
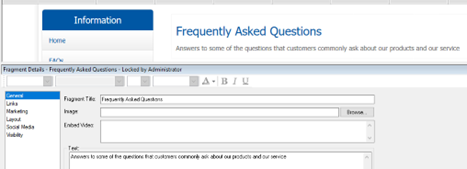
- Right-click the new page in the Content Tree and select ‘New Fragment’.
Enter a Fragment Title and some content and click ‘Apply Changes’.
- Click the ‘Layout’ tab.
- If this is the first Fragment on the page and the Fragment Title is the main heading for the page, select one of the two ‘Main Heading…’ layouts.
- If the Fragment Title is a subheading for a paragraph, select one of the two ‘Subheading…’ layouts.
- If you do not want the Fragment Title to appear in the page, select one of the two ‘Text…’ layouts.
- If this is the first Fragment on the page and the Fragment Title is the main heading for the page, select one of the two ‘Main Heading…’ layouts.
- If your site is based on Sellerdeck Swift, Fragments can contain multiple images in the same way that products can have multiple images. Select the ‘Zoom Images’ tab of the Fragment Details and refer to the ‘Product Images’ section of the Sellerdeck Swift Implementation Guide.
- If your site is based on Sellerdeck Swift then you can display Fragments in multiple columns – although this probably won’t work well if one of them is the overall page heading. Select the Brochure page in the Content Tree; then select the ‘Layout’ tab; and change ‘Column Count For Brochure Fragments’ to 2, 3 or 4.
How can I create a banner at the top of a page?
You can use a Fragment to add a banner image to the top of any Brochure or Section page.
- On a Section page you need to make Fragments appear at the top of the page. To do this, set the ‘Top Sub Section List Layout’ to ‘No Layout’ in the Layout tab of the Section Details; and select an appropriate layout for the ‘Bottom Sub Section List Layout’:

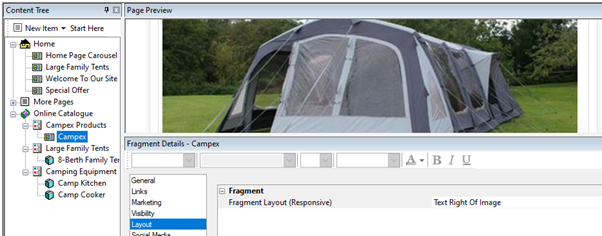
- Right-click the Section or Brochure page name in the Content Tree and select ‘New Fragment’.
- Give the Fragment a unique name (it will not be visible). Select the required Image and leave the Text blank.
Select the Fragment ‘Layout’ and select the Fragment Layout ‘Text Right of Image’ or ‘Text Left of Image’:
Summary
There are a variety of ways to include your overall bounce rate, including:
- Use impactful design
- Check actual page load times (not just PageSpeed score). Max 2 seconds.
- Optimise overly large images
- Make your USPs stand out
- Provide reassurance: https; clear payment and delivery info; contact information; testimonials / reviews and ratings;
- Have clear calls to action
- Provide clear structural and thematic onward navigation
- Fix issues with mobile devices
Ways to improve the bounce rate of individual pages:
- Does the page follow the general principles above?
- Does the page fulfil what it promises? Check the heading and subheading, Meta Description etc
- Is the page content relevant?
- Is the page content adequate?
- Find and disavow poorly-performing inbound links